Time to get ready for Easter with a simple song, movement, and reproducible activity.
Hop Along Easter Bunny

Motivating young learners of English through music, movement, multiple intelligences, and much more!
Time to get ready for Easter with a simple song, movement, and reproducible activity.
 Be My Valentine cover art by Shuli Ko
Valentine’s Day is on February 14th, just a short time away! To celebrate the occasion, I wrote a song that my young learners love to sing and move to. It’s entitled “Be My Valentine.” This song helps children learn the shape and sound of the letter “V.”
Children also explore how to make the shape of a heart with their hands, their arms, or with a partner.
The easiest way to demonstrate how to use this song is to view a video I created with my two nieces, Brooke and Shannon.
Just click HERE to see the video!
To hear and buy the studio version of the song, just click HERE on iTunes for the single, or HERE for the album (Track #4).
I hope that you and your children enjoying singing and moving to this song together, either at home or…
View original post 10 more words
Thanksgiving Day will be observed in the US in just two weeks! Celebrate with your young learners by doing the Turkey Dance! I’m reposting this blog from last year for those who might have missed it. Enjoy dancing with your kids to the Turkey Dance! Gobble, Gobble!!!
 Image courtesy of Tom Curtis / FreeDigitalPhotos.net
Autumn is a beautiful season. It’s also the time of the harvest, when farmers gather the food they’ve grown. In many countries, there are harvest festivals or special “Thanksgiving” days during which people give thanks for what they have. In the United States, many people celebrate with their families, and often enjoy a dinner together that includes roast turkey.
This song is a wonderful way to celebrate Thanksgiving Day in your home or school. It’s called The Turkey Dance, and as you can imagine, it gives children a chance to dance like . . . . turkeys!!
Here are the lyrics, which go to the tune of “Turkey in the Straw.”
Words by Kathleen Kampa and Charles Vilina, music adapted from Turkey in the Straw
copyright © 2013 by Kathleen Kampa
Spoken: It’s Thanksgiving Day. Let’s move like turkeys.
First…
View original post 182 more words

Skeleton Dance is definitely one of my students’ favorite songs! It teaches various body parts and directional movements. You can start your school day with it, use it during break time, dance it on a rainy day, move during a health unit, or dance it on Halloween. I have taught Skeleton Dance to students in kindergarten through upper elementary, and everyone enjoys it. I’ve also shared this song with teachers in America, Japan, Korea, Mexico, Taiwan, Thailand, Vietnam, and Indonesia.
You can watch some of my students here in Japan doing the Skeleton Dance, and read the lyrics below:
Here’s how you do the Skeleton Dance:
In this song, students will move four different body parts: shoulders, elbows, knees, and feet.
First, students move their shoulders to the beat.
1. Move your shoulders . . .
A. Skeleton, skeleton, skeleton dance,
Move your shoulders, do the skeleton dance.
Skeleton, skeleton, skeleton dance,
Move your shoulders, do the skeleton dance.
Next, students move their whole bodies to the front, to the back, and to the side. I usually start by moving only my arms, but my students love to jump in each direction.
B. To the front, to the back, to the side, side, side,
To the front, to the back, to the side, side, side,
Next, students move their shoulders up, down, and around. Each time they repeat the song, they will move a different body part in these directions.
C. Put your shoulders up. Put your shoulders down.
Move them up and down and all around.
Put your shoulders up. Put your shoulders down.
Move them up and down and all around.
Finally, students move their shoulders in their own way.
D. Shoulders dance . .ch ch ch ch ch ch ch ch
Shoulders dance . .ch ch ch ch ch ch ch ch
This dance is repeated with the following body parts.
Before I play the music, my students and I figure out how we’ll move up, down, and around using each of these body parts.
2. Move your elbows . . .
3. Move your knees . . .
4. Move your feet . . .
You can download this song from iTunes (Track #15) or CD Baby.
I hope that your students enjoy this as much as mine do.

Image courtesy of stockimages / FreeDigitalPhotos.net
Do your students enjoy learning vocabulary? It is certainly one of the first steps in learning a new language. A few simple strategies can help our students learn vocabulary meaningfully and productively.
Picture cards can be a very effective way of introducing vocabulary. One method is to point to a picture, say the word, and ask students to repeat it. However, this is a passive approach that doesn’t motivate children to learn — and it doesn’t build their deeper thinking skills.
One approach that provides active learning and deeper thinking is as follows. Let’s assume you are introducing words from Magic Time One Unit 10, which introduces the following pets:
rabbit dog turtle bird frog cat
Before class, attach the picture cards for this vocabulary to the board face down (with the back of the card facing the students). Explain to students that you have six pets that you want to introduce to them.
Peel back the first card to secretly look at the first pet. Turn to the students as you imitate the shape or movement of the animal (such as a hopping rabbit, the wagging tail of a dog, or a slow-moving turtle).
Some of your students may know the English word for the animal, and will call out its name. If they do so correctly, nod yes and reveal the card. If not, say the word as you do the action (for example, say frog as you jump like a frog). Then reveal the picture card. When you show the picture card, say the word twice, first pointing to the picture, then to the written word beneath it. Continue in the same way with all six cards.
Another way to do this would be to bring in stuffed animals, pulling them slowly out of a bag until students are able to identify them. You may also do a “slow reveal” of the picture card, sliding it up from behind a book until students are able to guess what it is.
The above activities allow students to tap into their prior knowledge – this will tell us what they already know. It also gets them to think about the subject of pets – as they guess the animals, their brains are thinking about which animals could possibly be pets. This simple activity then becomes a critical thinking activity that engages students far beyond memorization.
In the next activity, we want to move to more productive skills – with our students actually using the language. Remember that this can take time – students need to move through the receptive stage first. However, this activity motivates them to use the language more quickly.
Let’s assume you are using the set of words from Magic Time One Unit 11, which introduces family members:
grandmother mother sister grandfather father brother
Let’s also assume that we have taught these words using one of the activities described above. Our next goal is to get our students to produce these words while using their critical thinking skills.
Attach the family picture cards in random order across the board so that students can see the family members. Then draw a simple picture of a girl on one side of the board, and a picture of a boy on the other side. Ask students to tell you which picture cards belong on which side. This requires students to say the words (grandmother, father, etc.) as they point to them. Then attach the picture cards under the boy or girl, but not in any particular order.

Next, invite students to pair up the family members. To do so, point to the mother card as students say mother. Move the card to the top of the board as you say “mother and . . .” Students point to the father card as they say the word father. Then place the two picture cards together on the board. Continue in the same way with sister – brother and grandmother – grandfather.

Students can each have their own set of six picture cards, which they can make themselves, or which can be copied from the Magic Time Picture and Word Card Book. You can ask students to classify the cards at their desks, in the two ways described above. You can also ask students to classify and arrange the cards in other ways — from oldest pairs to youngest pairs, for example, or in ABC order. With other picture card sets (such as classroom items), students can arrange the items in other ways, such as from biggest to smallest.
In Magic Time, we also practice vocabulary by putting the words into chants and songs. This gives students an opportunity to produce the language as they chant and sing along. It also helps students build comprehension of the words. Chants and songs make learning fun and memorable.
Finally, for Magic Time users, the following activity is very engaging for students, allowing them to predict, think about what they know, and use the language productively. This is normally done after the chant is taught to the students:
On the first and third pages of each unit in Magic Time, students are asked to “Listen and write the number.” Normally, students listen as the narrator on the CD says, “Number One,” followed by a word. Students then write the number “1” in the white circle next to the correct picture in the large scene. This serves as an assessment to see what students know. Click on the link below to see sample pages from Magic Time One Unit 7.
To make this activity more productive, first put the six picture cards on the board facing the students. Draw a white circle next to each picture card. Pause the CD, and ask students to guess what they think “Number One” will be. Each student needs to point to a picture card and say the word. Write each student’s name beside the picture cards they choose. Then listen to what the narrator says on the CD for “Number One.” Of course, students are listening very closely to see if their guess is correct. If so, they cheer! All students then write the number “1” in the correct white circle in their student books. With the CD paused, students then try to guess the second word, and so on. You can keep track of each student’s correct guesses if you wish. With a large class, this activity can be done with partners or with teams.
These are just three ways to get your students to think more deeply as they use the vocabulary words meaningfully and productively. These activities go beyond simple memorization and comprehension – they allow students to tap into their prior knowledge, to understand relationships, and to predict. They require active participation and active learning, which means happier and more engaged students.
Happy Teaching!
Kathy and Chuck


Can you nurture creativity while building English language skills? Yes, you can!
An important part of creative thinking is to generate many possible solutions. This is easy to do with young learners. Here is a simple activity and chant that you can use to help develop creative and imaginative thinking with your young learners.
Introducing Vocabulary
1. Show students (or draw) a picture of a circle. Say, What is this? Can you make this shape with your fingers?
2. Point out the various ways that your students are making circles. For example:
Yuri is making a tiny circle using her thumb and pointer finger. Can you do that?
Daniel is using all of his fingers to make a circle. Let’s try that, too! We can make circles in many ways.
3. Say, Can you make your circle bigger? Can you make a circle with a friend?
4. Repeat the three steps above using other shapes. I usually show shapes in the following order because some are a little easier to make than others.
circle
triangle
heart
rectangle (two long sides, and two short sides)
square (four equal sides)
star (five points)
Remember, it’s important to take time making these shapes with your students before putting them into the chant.
Teaching the Chant
Here’s the first verse of the chant.
My Fingers Dance by Kathleen Kampa Vilina ©2003
My fingers, fingers, fingers, fingers, fingers dance!
My fingers, fingers, fingers, fingers, fingers dance!
Make a circle. Take a picture. Click!
Make a circle. Take a picture. Click!
Now, let me break it down so that you know the movement for each part.
1. My fingers, fingers, fingers, fingers, fingers dance!
My fingers, fingers, fingers, fingers, fingers dance!
(For this part, students have fun wiggling or “dancing” their fingers.)
2. Make a circle.
(Students make the shape with their fingers.)
3. Take a picture. Click!
(Students look through the shape at a classmate, and pretend to take a photo.)
(Repeat steps 2 and 3.)
(Students then substitute the other shapes in this chant.)
You can use any shape picture cards to teach the vocabulary. I used the picture cards from Magic Time 1, Unit Two, for my video. Feel free to add your own shape ideas, such as diamonds, ovals, etc.
Here’s a video I’ve prepared to show you how the chant is done. Just click here. You can also find a studio version of this chant on iTunes by clicking here.
This chant is also on my new album Jump Jump Everyone, available on iTunes. Physical CDs are also available.

Happy teaching, everyone!
Kathy
In my last post, I explained two ways to teach this song. Here’s a video of my students sharing this dance with you. You can find the lyrics in my blog post “Hop Along Easter Bunny.” If you like this music, check out my CD Kathy Kampa’s Special Days and Holidays, available on iTunes and CD Baby.


(Note: This is our second blog post on transitional songs. Our first blog post, entitled “Transitional Songs Part One,” was posted on September 23, 2013. Please scroll down this page to our earlier blog posts to find it, or simply click here. Thanks!)
In any children’s class, many activities are needed to keep students happy and motivated throughout the lesson. Transitional songs are a perfect way to signal to children that one activity is ending and another is beginning. A good transitional song also has other benefits:
Today, for Part Two, we present a variety of transitional songs that help to make activities smooth and enjoyable for students.
This song is a great way to motivate students to open their student books to the correct page.
Open Your Books (copyright © 2012 by Kathleen Kampa and Charles Vilina)
Open your books. Please open your books. (gesture)
(Spoken) Turn to page _________.
(Write this page number on the board, or show the number with your fingers. Hold the book open to show the page to students, then check to be sure all students are ready.)
Open your books.
This transitional song quickly motivates children to form a line in the classroom, either for an activity or when they are preparing to leave the classroom.
Let’s Make a Line (copyright © 2012 by Kathleen Kampa and Charles Vilina)
(melody: Skip To My Lou)
Let’s make a line long and straight,
Let’s make a line long and straight,
Let’s make a line long and straight,
Let’s make a line long and straight.
This is a great chant to use when students need to find a partner. Demonstrate this chant with one student first. Decide how students will show that they are partners. They can stand back-to-back, touch palms, sit facing each other knee-to-knee, etc.
Practice finding partners before you actually do your activity.
Find a Friend (copyright © 2012 by Kathleen Kampa and Charles Vilina)
Find a friend, find a friend,
before I can count to ten.
1-2-3-4-5-6-7-8-9—— 10! Hooray!
This is a fun way to say goodbye to your students at the end of the lesson!
Goodbye (copyright © 2012 by Kathleen Kampa and Charles Vilina)
(melody: Good Night Ladies)
Good-bye children! Good-bye children!
Good-bye children! It’s time for you to go.
Clap your hands and walk along, walk along, walk along,
Clap your hands and walk along, I’ll see you very soon.
Good-bye children! Good-bye children!
Good-bye children! It’s time for you to go.
We Did It! (copyright © 2012 by Kathleen Kampa and Charles Vilina)
We did it! We did it! We did it today!
We did it! We did it! Hip hip hooray!
We did it! We did it! We did it today!
We did it! We did it! Hip hip hooray!
(All songs and chants in this blog are copyright © 2012 by Kathleen Kampa)
Happy teaching, everyone!!
Kathy and Chuck
When I was a little girl, we made “Fortune Tellers” to play with our friends. We used our homemade fortune tellers to write messages about things that might happen when we grew up.
Your students will love this game. It’s easy for students to put into their pockets and play wherever they go. You can practice any vocabulary or grammar by adapting the game in this way.
Here’s an example of a fortune teller from Magic Time 2, Unit 5, Teacher’s Book reproducible by Oxford University Press. Once you understand how this fortune teller works, your students can create their own. This unit focuses on toys with the phrase “I have a _________.” They can expand it to “You have a ________.”
Download a free Fortune Teller template taken from Magic Time Teacher’s Book 2.
3. Copy one sheet per student. Students cut out on the dotted lines to create a square.
a. To begin, have students fold the paper in half.
Open and fold in half the other way. This makes folding easier. (See below.)

b. Turn paper over. Find the middle point. Fold the corners to this middle point. Crease well.

c. Turn the paper over again. Fold the new corners to the middle.
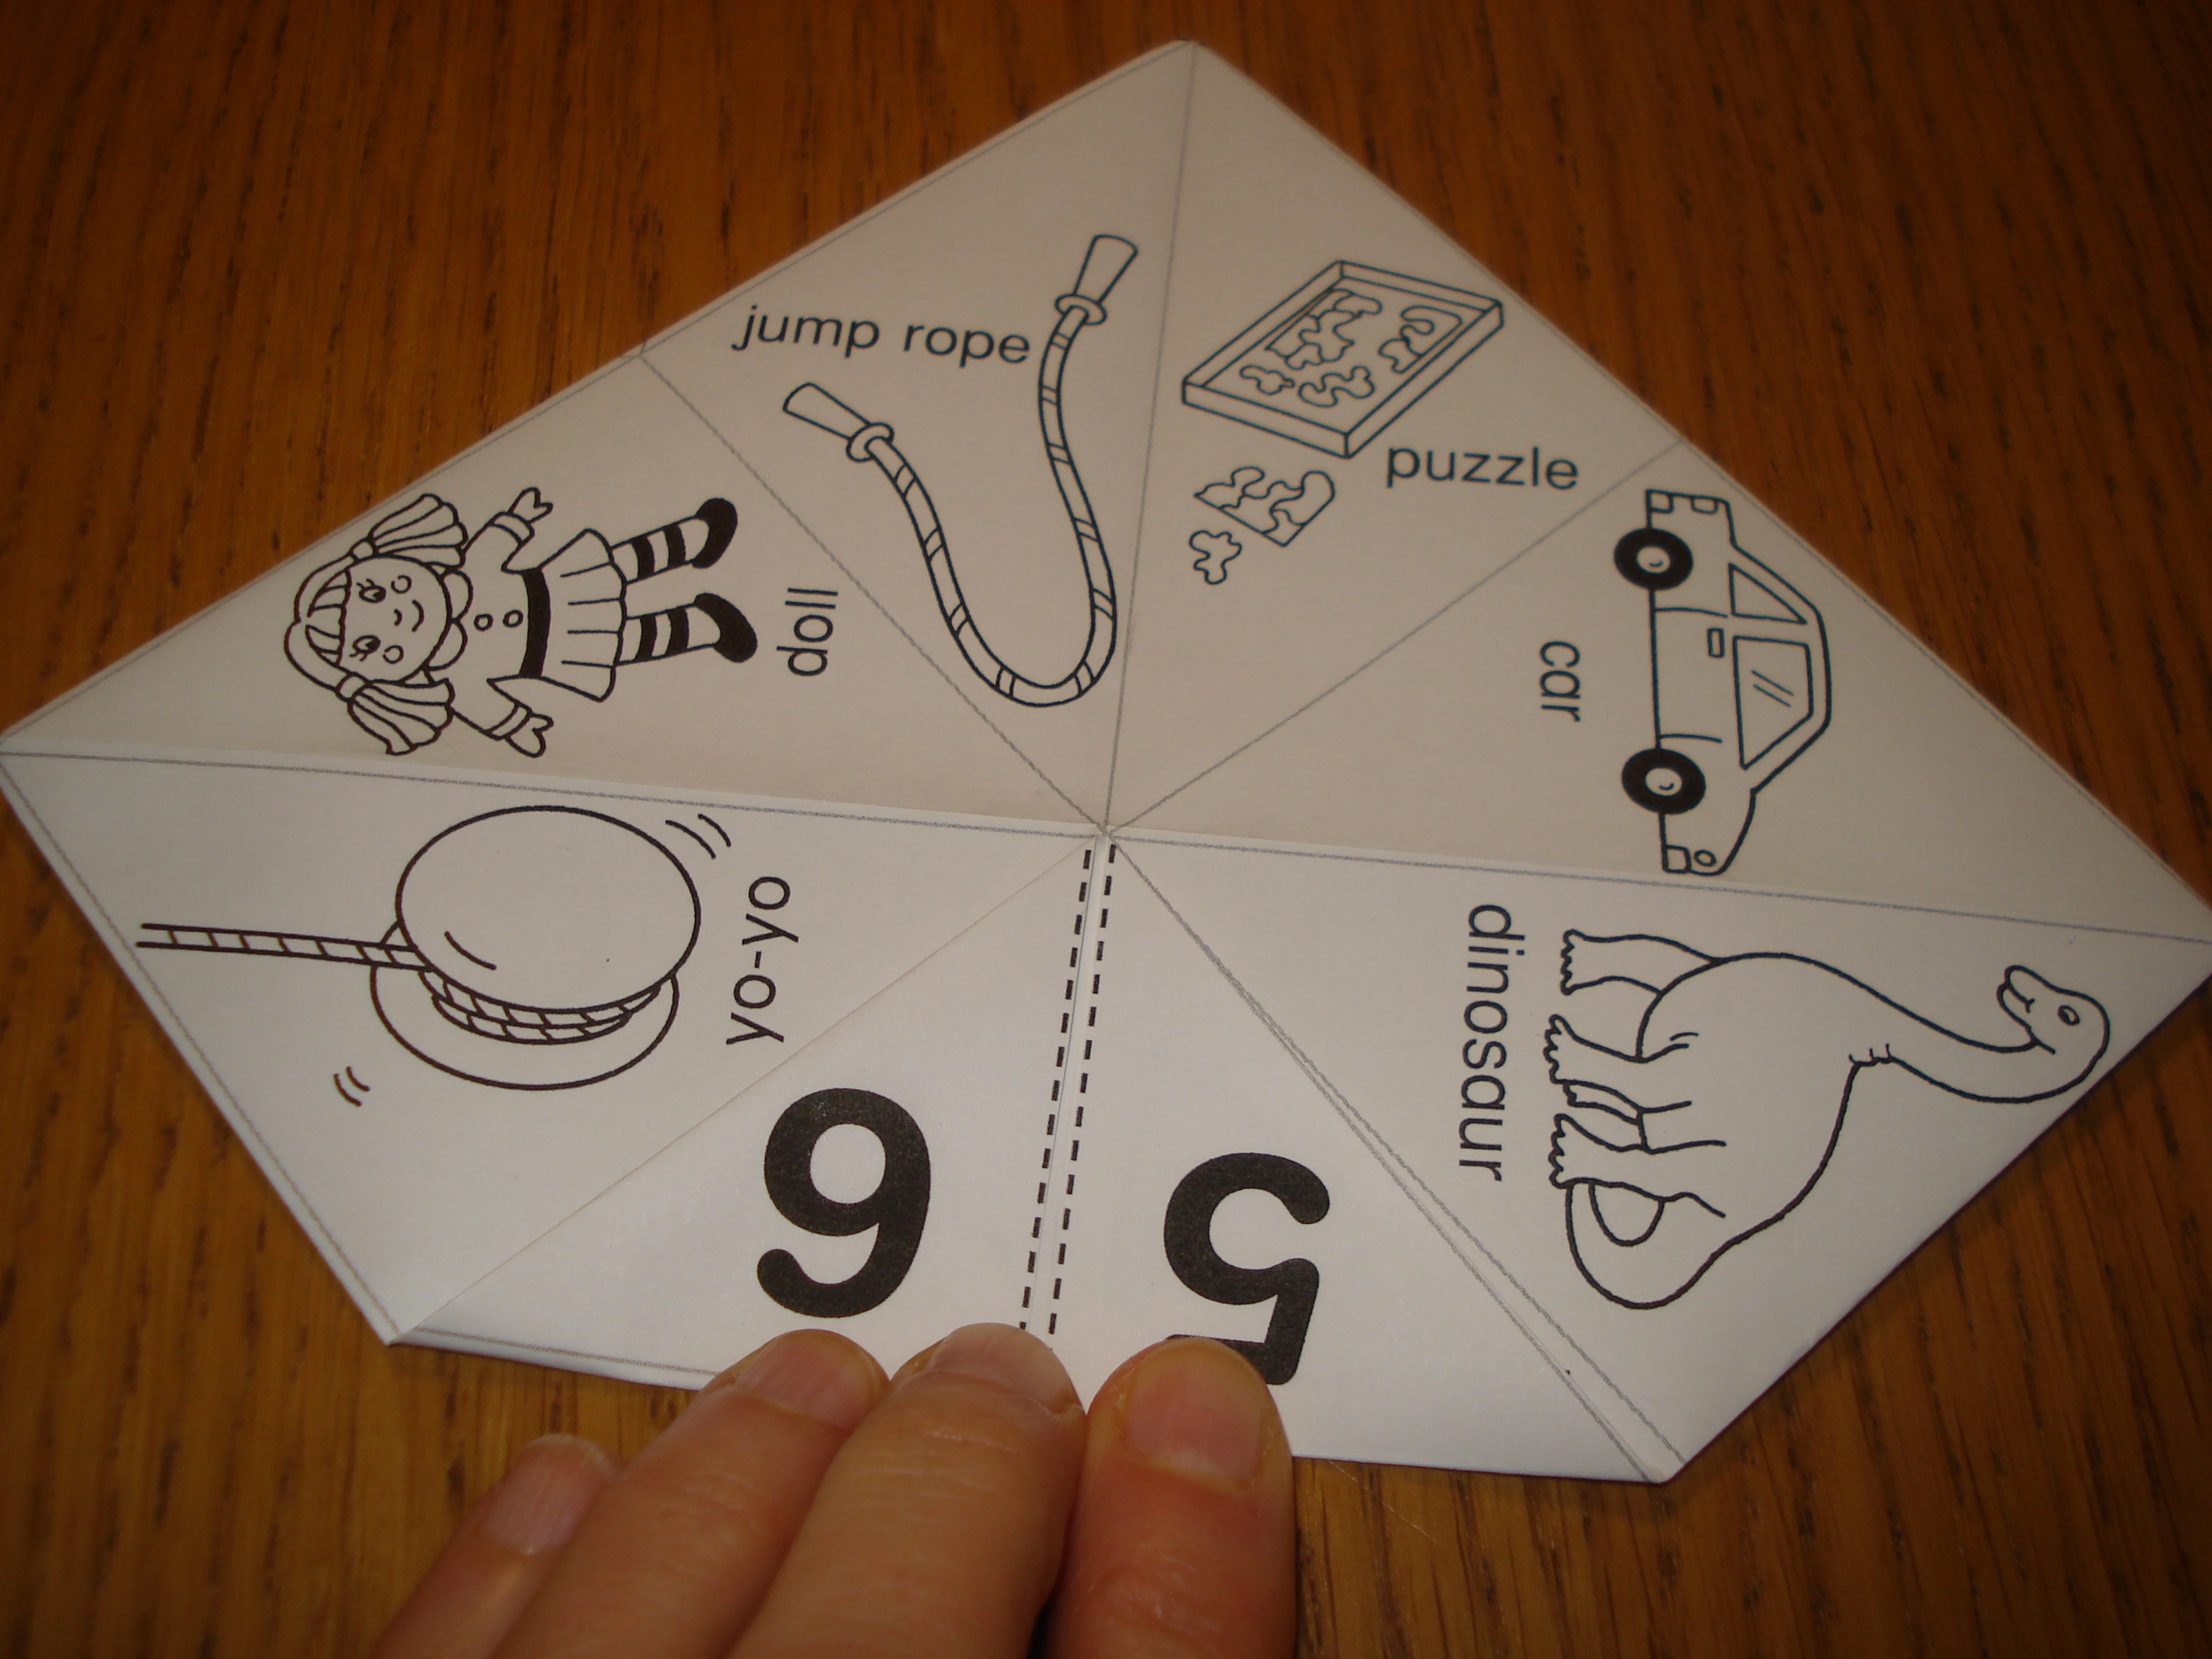
d. Find the numbers. Cut up from the point up to the fold between each of the numbers (1 and 2, 3 and 4, 5 and 6, 7 and 8).
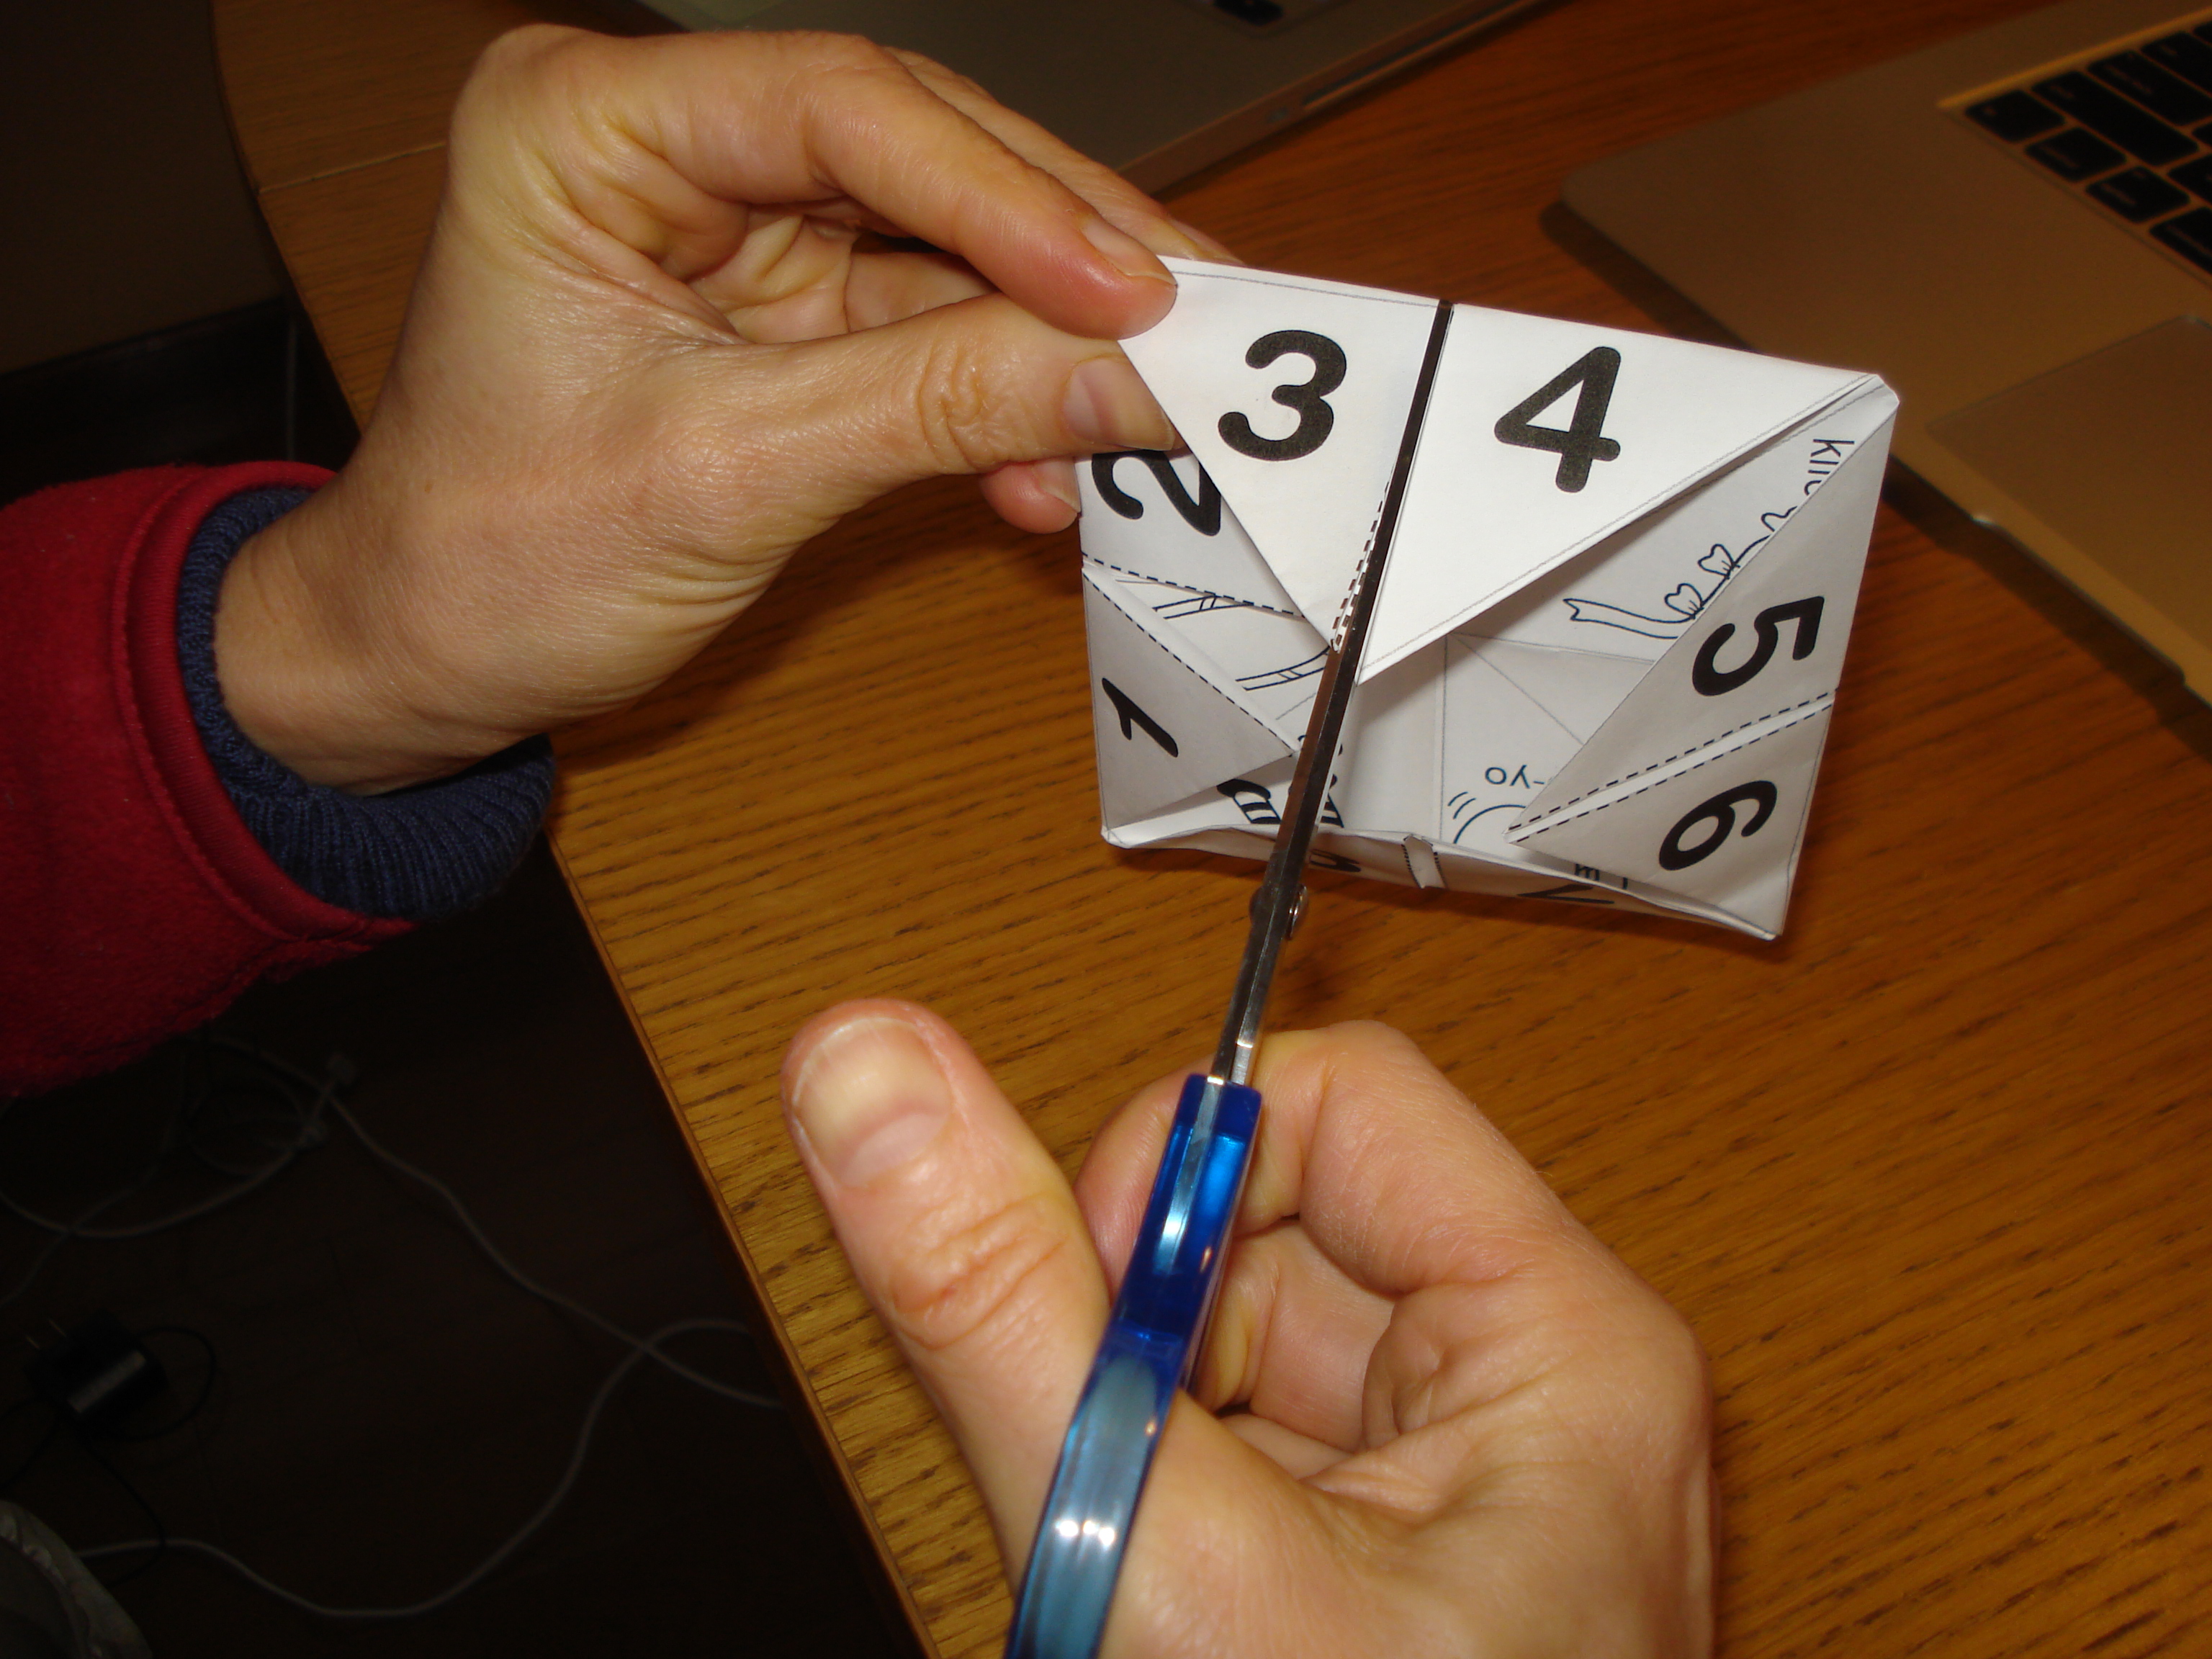
e. Now fold it in half so that you can put your thumbs and pointer fingers into the four openings at the bottom.

f. Bring the points together. Then open and close the fortune teller.
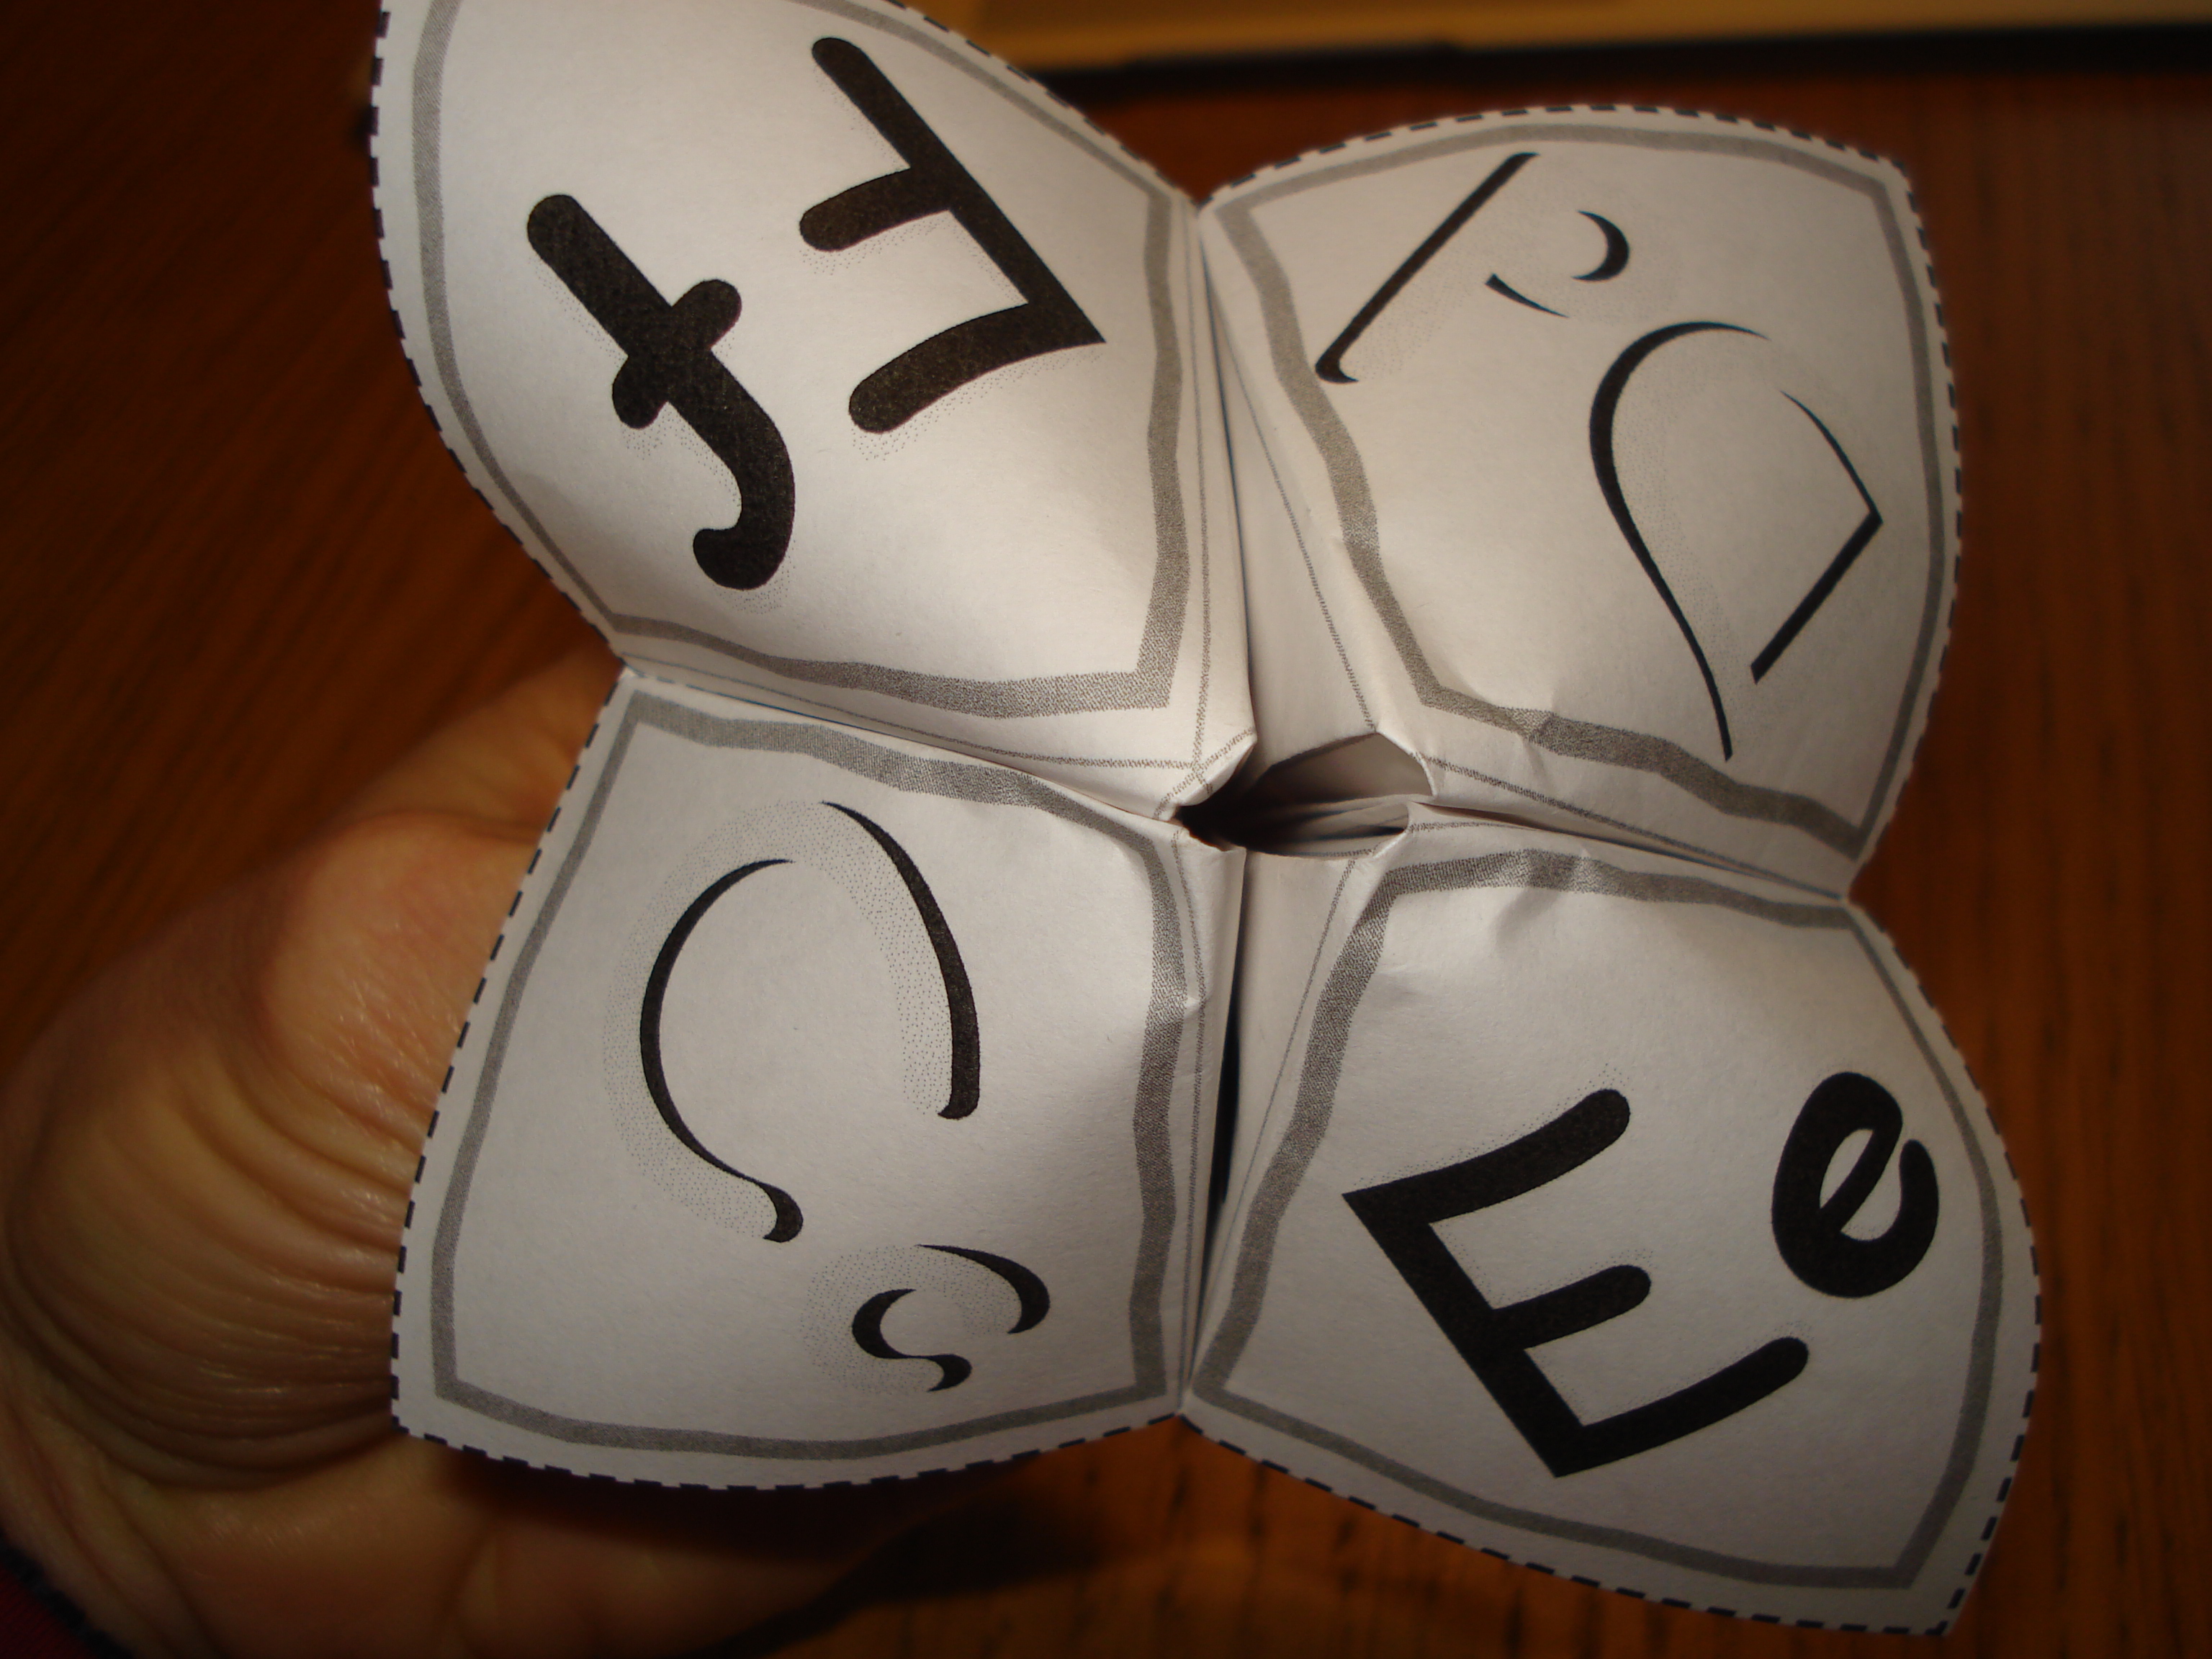
To play the game:
A: Asks, “Which letter?”
B: Says (for example), “C.”
A: Moves the fortune teller three times, and says, “A-B-C.”
A: Shows the inside of the fortune teller, and asks, “Which number?”

B: Says (for example), “4.”
A: Moves the fortune teller four times, counting to 4.
A: Shows the inside of the fortune teller again, and asks, “Which number?”
B: Says (for example), “7.”

A: Says, “You have a yo-yo!”
With a little creativity, you can add more language to these dialogues. With this fortune teller, students can imagine that they’re celebrating a birthday.
A: “Happy Birthday. This toy is for you! It’s a yo-yo!”
B: “Thanks a lot!”
Or they can pretend to be Santa, saying “Ho, ho, ho! Merry Christmas. Here’s a yo-yo for you!”
To make your own fortune teller, do your folding first. Then open it up and add numbers, pictures, words, etc. Instead of counting or saying the ABC’s, more advanced students can spell out words.
Keep me posted . . . I’d love to see how your creativity builds upon this idea in your classroom.
Happy Teaching!
Kathy
 Be My Valentine cover art by Shuli Ko
Valentine’s Day is on February 14th, just a short time away! To celebrate the occasion, I wrote a song that my young learners love to sing and move to. It’s entitled “Be My Valentine.” This song helps children learn the shape and sound of the letter “V.” You might even call this song “V-V-Valentine.”
Children also explore how to make the shape of a heart with their hands, their arms, or with a partner.
The easiest way to demonstrate how to use this song is to view a video I created with my two nieces, Brooke and Shannon.
Just click HERE to see the video!
To hear and buy the studio version of the song, just click HERE on iTunes for the single, or HERE for the album (Track #4). You can also find the music on Spotify.
I hope that you and your children enjoying singing and moving to this song together, either at home or in the classroom!
Sending warm Valentine wishes,
Kathy and Chuck
